Sunday, February 12, 2012

Self Portrait Experimentation

I have been dying to do a self portrait for years now, but have never gotten the nerve or taken the time to do it. Well, I made a last minute decision to start this one & finish it ;) Here it is!

I know, i know im crazy for trying to work from a b/w photo but i thought it would be challenging & fun ;)


Giving the hair some definition on top of underlying color.
Adding more layers to the face & shoulders.


Darkening the layers on the skin


Adding more color & definition to the mouth


Couldnt stand it! Had to take a break from the skin color to make the hair PERFECT.


Felt finished until I realized how pale i looked.


Now it really is finished...needed another layer of pink on the cheeks :)
YAY ME!

Sunday, January 15, 2012

FINISHED!?

Back to the grind ;)

 1st layer on the body


 2nd layer 


 3rd and 4th layer & noticed a part of her mouth that I missed ;) Added it!


 5th layer


 6th layer


7th to 9th layers


 10th and 11th layers and 1st layer on feet


 2nd to 4th layers on feet


 Layers 5-9 on feet


 Layers 10 and 11 on feet


 Finished portrait with reference photo


Completely FINISHED & signed ;)

Sunday, January 8, 2012

January 7th & 8th...Working!

Okay, so I have a free weekend and I am proud to say that I am on a roll with this portrait....FINALLY! :)

 I finished the first ear


Finished her eye and got the 1st layer on the 2nd ear


 4th layer on the 2nd ear


 5th layer 


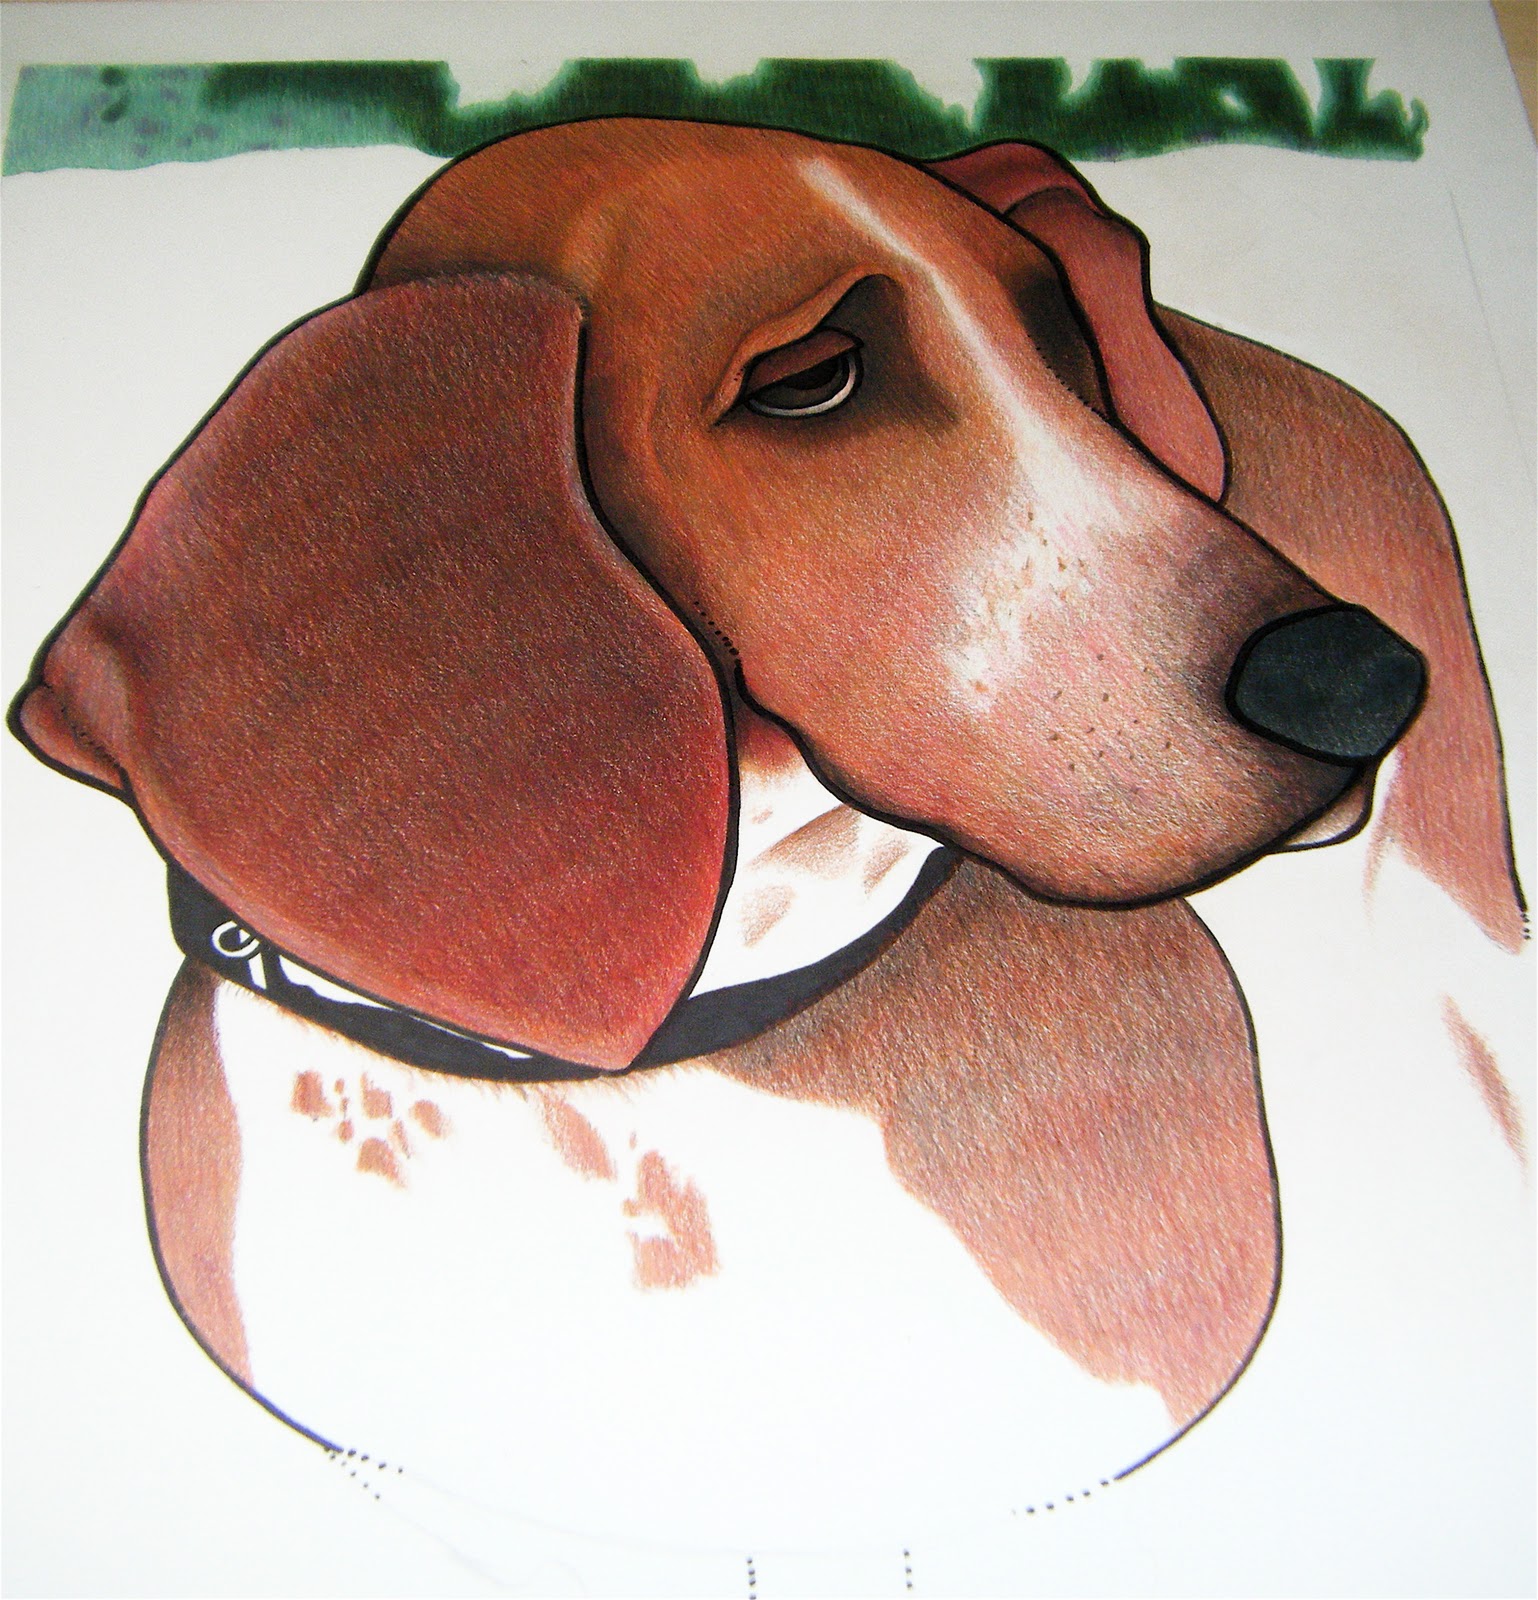
 Close-up of finished 2nd ear


 Overall look after finishing the eye and 2nd ear


 1st layer on her face

By putting these base colors down first I am making the process much smoother for when I begin adding the darker colors for shadows. You will see that by the end I have a really nice color to her face that is built from a total of 11 different layers of colors.


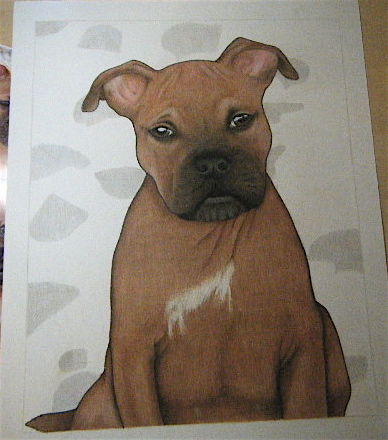
 Beginning of 2nd layer


 Finished 2nd layer


 Moving along...4th layer completed


 5th layer and her nose 


 6th layer

You can see how that 5th layer mellowed out that bright orange that I had going on. It all works together little by little.


 7th layer


 8th layer...getting to the darker colors now


 Close-up of finished nose and the 9th layer


Layers 10 and 11 are black and indigo blue & they only have to be added to certain darker areas so they are truly quick and easy to add. They give the picture the amazing depth and realness. 

Scanned version alway looks so much better!

so close to being done...

Saturday, December 31, 2011

New Pet Portrait...Bella :)

I started this MTHS AGO, but have too much going on...*sigh* I couldnt get the pics uploaded @ the old house so I am happily adding them now that my internet is better :)

 Bella :)


 1st layer on the background


 3 layers done...


 Adding some shadows to the background...


 Close-up of shadows


Background is FINISHED!


 All the colors for Bella...ready to go!


 Sharpie outline


 First few layers done...


 3rd and 4th layers


 Layers 5 and 6


7th layer ;)

Monday, December 26, 2011

2011-2012 Portrait Pricing


I have been doing the pricing for the portraits with each customer that is interested. I have others that are just curious about prices & sizes, so I am posting sizes with APPROXIMATE prices. Please keep in mind that these are approximate due to some people wanting more than one person in a portrait or even the amount of work that I put into the piece.  The prices are subject to change, so please be aware of this ahead of time. All photos that are provided must be good quality photos that are clear, so that I can use them as reference photos throughout the drawing process. I also do pet portraits and family portraits :D Please feel free to ask questions, if needed :)

8x10 ~ $100.....one person ONLY
9x12 ~ $125.....one person ONLY
10x13~$140.....up to 3 ppl
11x14~$150
16x20~$200
18x24~$250

Please feel free to contact me through my email spatialartist@att.net & I will be happy to answer any questions. Pics are welcome as well if you need for me to approve photos for a portrait :) Keep in mind i tend to crop photos to my need & change some colors & contrast if needed.

jenny

Saturday, March 26, 2011

Working through the background...

The plan is to finish this ASAP! ;) Working off & on throughout the day today :D

Started this morning after drinking coffee ;) I start by adding abstract shapes to the background with a white-out pen.

Then, I add color to the area that would be the middle of the shape. From there I add the dark shadow to the highlighted side. 

After I have the texture that I am comfortable with I add different shades of brown to the top of the shapes to make them look as if they are further in the background ;)

ONE side finished...now for the other side...LOL!

Tuesday, March 8, 2011

Background work...


After i got sick my poor lil guy got sick & it was MISERABLE around here! Now that we are all back to true form I am ready to finish this PORTRAIT ;)

This is the larger rocks in the background....the color was so different from the rest of the background so I decided to do them first then add on top.

1st layer on the entire background

2nd & 3rd layers on the entire background

3rd & 4th layers on the entire background

Next step is to go through the whole background & add the highlights on all the little rocks that will be in the brown areas of the background. I will use a white-out pen to add the highlights then I will go through & add the shadows to each rock :) Gonna be a process, but i think it will look AMAZING ;)